
The latest improvements & new capabilities in Fluint.
Product Updates

Microsoft Dynamics 365 is Here
If your team runs on Dynamics, Fluint now syncs your CRM, answers questions about your pipeline, and pushes documents back to your opportunities — full parity with Salesforce and HubSpot.
Why it matters
Dynamics customers have spent years getting second-class treatment from the sales-tool ecosystem. Most platforms ship Salesforce and HubSpot integrations first, then maybe-someday Dynamics — and when it does land, it's usually a stripped-down version of what other CRMs get.
Fluint now connects to Microsoft Dynamics 365 with full parity. Your accounts, contacts, opportunities, and pipeline stages sync into Fluint; Olli answers questions about your Dynamics data directly in chat; and document revisions push back to the opportunity timeline automatically. Same intelligence, same workflows, same Olli — wherever your CRM lives.
How it works
Once connected, Fluint pulls your full Dynamics workspace — accounts, contacts, opportunities, users, and pipeline stages. Opportunities become deals in Fluint automatically and are assigned to the right rep based on email matching, so your team sees their book of business from day one.
Olli queries your synced Dynamics data directly. Ask "What's the pipeline value of my deals closing this quarter?" or "Show me all open opportunities for Acme Corp" and Olli responds in chat without you needing to log into Dynamics.
Document revisions flow back into Dynamics too. When you publish a revision on a Dynamics-connected deal, it lands on the opportunity timeline as a Note with the rendered document attached. Subsequent revisions update the same Note rather than spawning duplicates, so your Dynamics record stays clean.
If you only want certain pipeline stages to become Fluint deals, set stage filters in your integration settings — Fluint will only pull opportunities matching those stages on the next sync.
Getting Started
- Go to Settings > Integrations and click Microsoft Dynamics 365
- Enter your Dynamics org subdomain (e.g. yourorg.crm.dynamics.com) and click Continue
- Sign in with your Microsoft account and approve the permissions Fluint requests
- Wait for the first sync to complete (a few minutes to a couple of hours depending on your instance size)
- Ask Olli "What's in my Dynamics pipeline?" to confirm everything is connected
- Set stage filters in Settings > Integrations > Microsoft Dynamics 365 > Filters if you want to limit which opportunities become deals
Notifications: Olli Keeps You in the Loop, Your Way
A single smart digest instead of a flood of pings — on your schedule, in your channel.
Why it matters
Staying on top of your pipeline shouldn't mean drowning in notifications or checking three tools to figure out what changed. But most CRM alerts are noisy, repetitive, and disconnected from context — so they either pile up unread or get turned off entirely.
Now Olli batches everything into a single digest written in plain language, delivered on your schedule, to the channel you actually check. Meeting recaps, deal health changes, account updates — surfaced together with context on what changed and why it matters. And when something can't wait, you set that category to immediate and it arrives in real time. You control the signal. Olli eliminates the noise.
How it works
Olli sends smart digests that batch your activity into a single update written in its own voice, pulling from meeting recaps, deal health updates, and account summaries.
Notifications land in email, Slack DM, or both. To connect Slack, mention @olli in any channel and click the Link Account button in the private message you receive. Email and Slack cadences are configured independently.
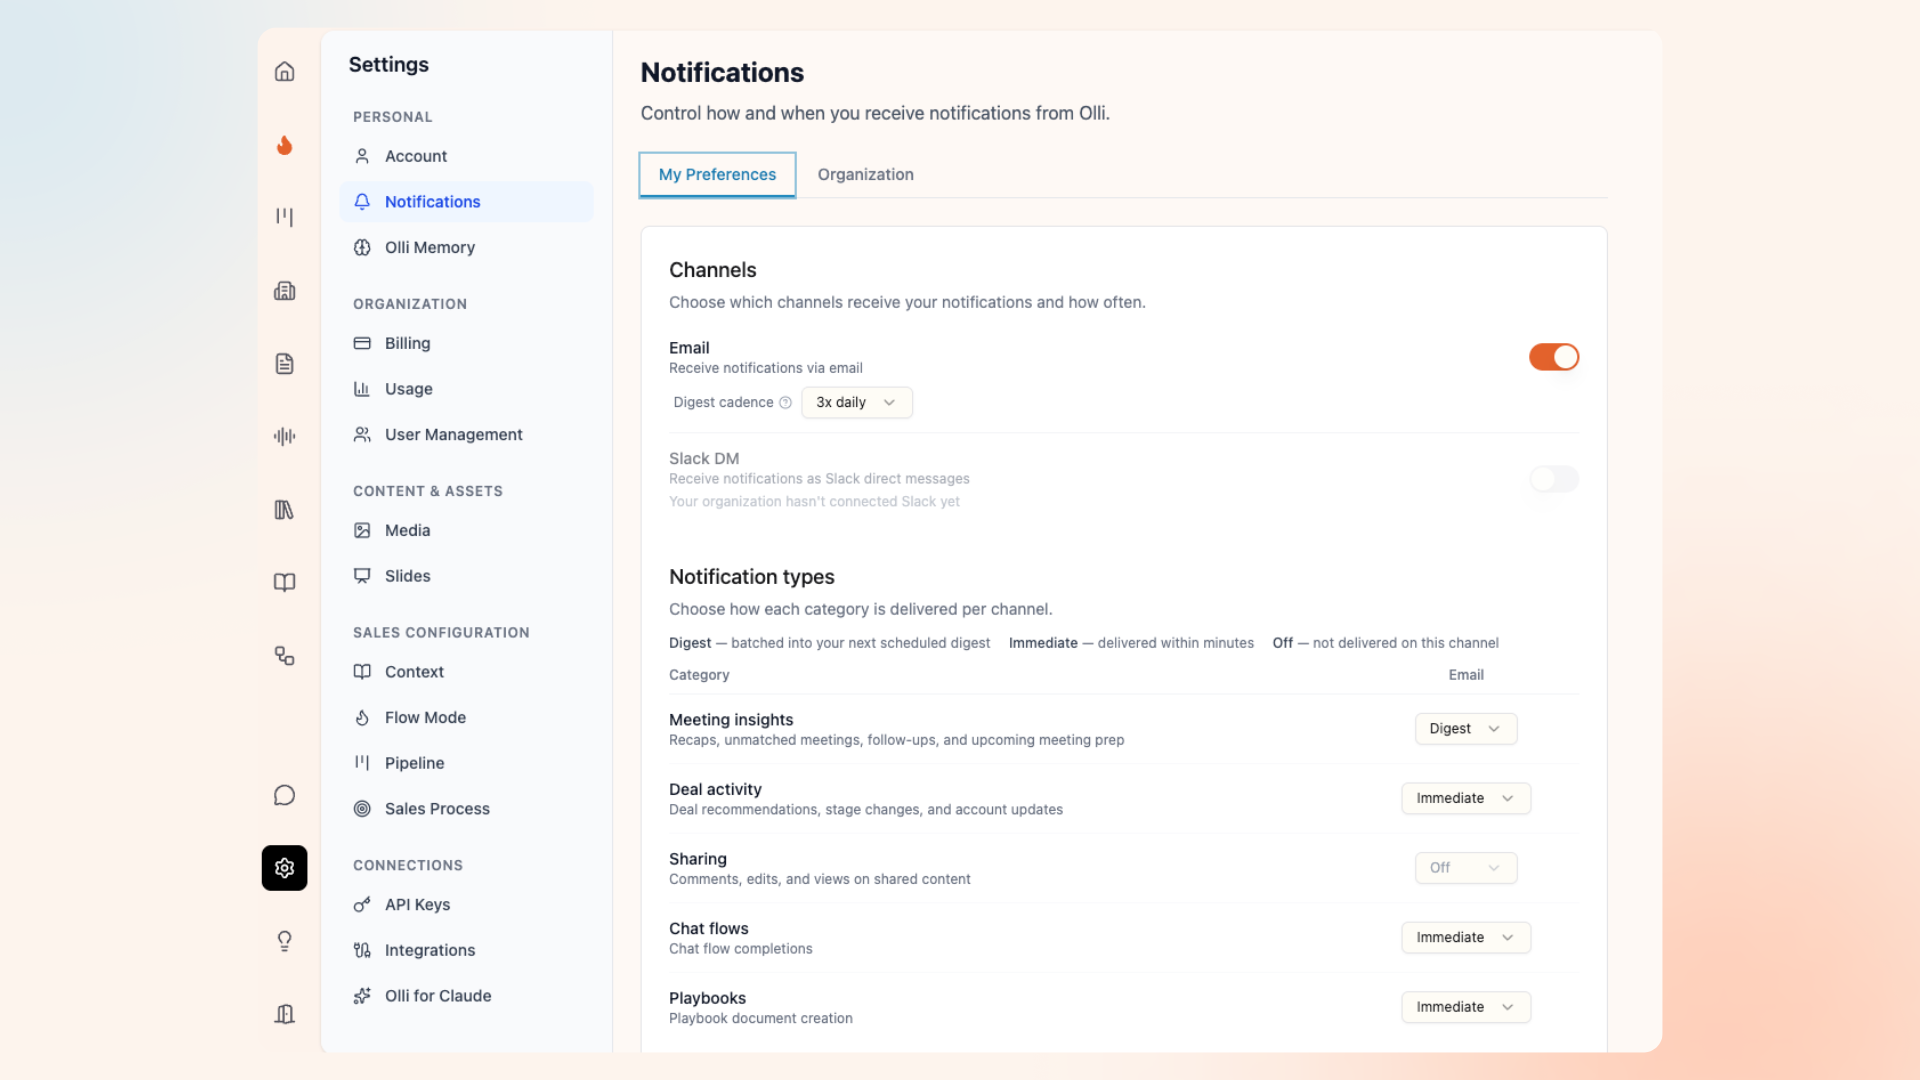
Digest frequency is fully customizable: 3x daily (7am, 12pm, 5pm local time), 2x daily, 1x daily, every 4 hours, or off. For anything time-sensitive, flip the category to Immediate and it delivers in real time instead of waiting for the next digest window.
Per-category control lets you set each of the 8 notification categories — Meeting insights, Deal activity, Deal health, AI insights, Sharing, Chat flows, Playbooks, and Olli memory — to Digest, Immediate, or Off independently on each channel. Daily email digests but immediate Slack pings for meeting recaps? Done.
Every notification includes deep links directly to the relevant deal, meeting, account, or document in Fluint — no digging through your inbox to find what Olli's referencing.
Getting Started
- Go to Settings > Notifications to open your preferences
- Turn on Email, Slack DM, or both, and pick your digest cadence for each (default: 3x daily at 7am, 12pm, and 5pm local time)
- Decide per category whether you want Digest, Immediate, or Off on each channel
- (Optional) Override your timezone if Fluint's detected one isn't right
- Changes save automatically — no Save button needed
Fluint for Startups: Move Fast, Onboard Yourself
The full power of Olli and Fluint, now available in a self-service tier designed for lean teams.
Why it matters
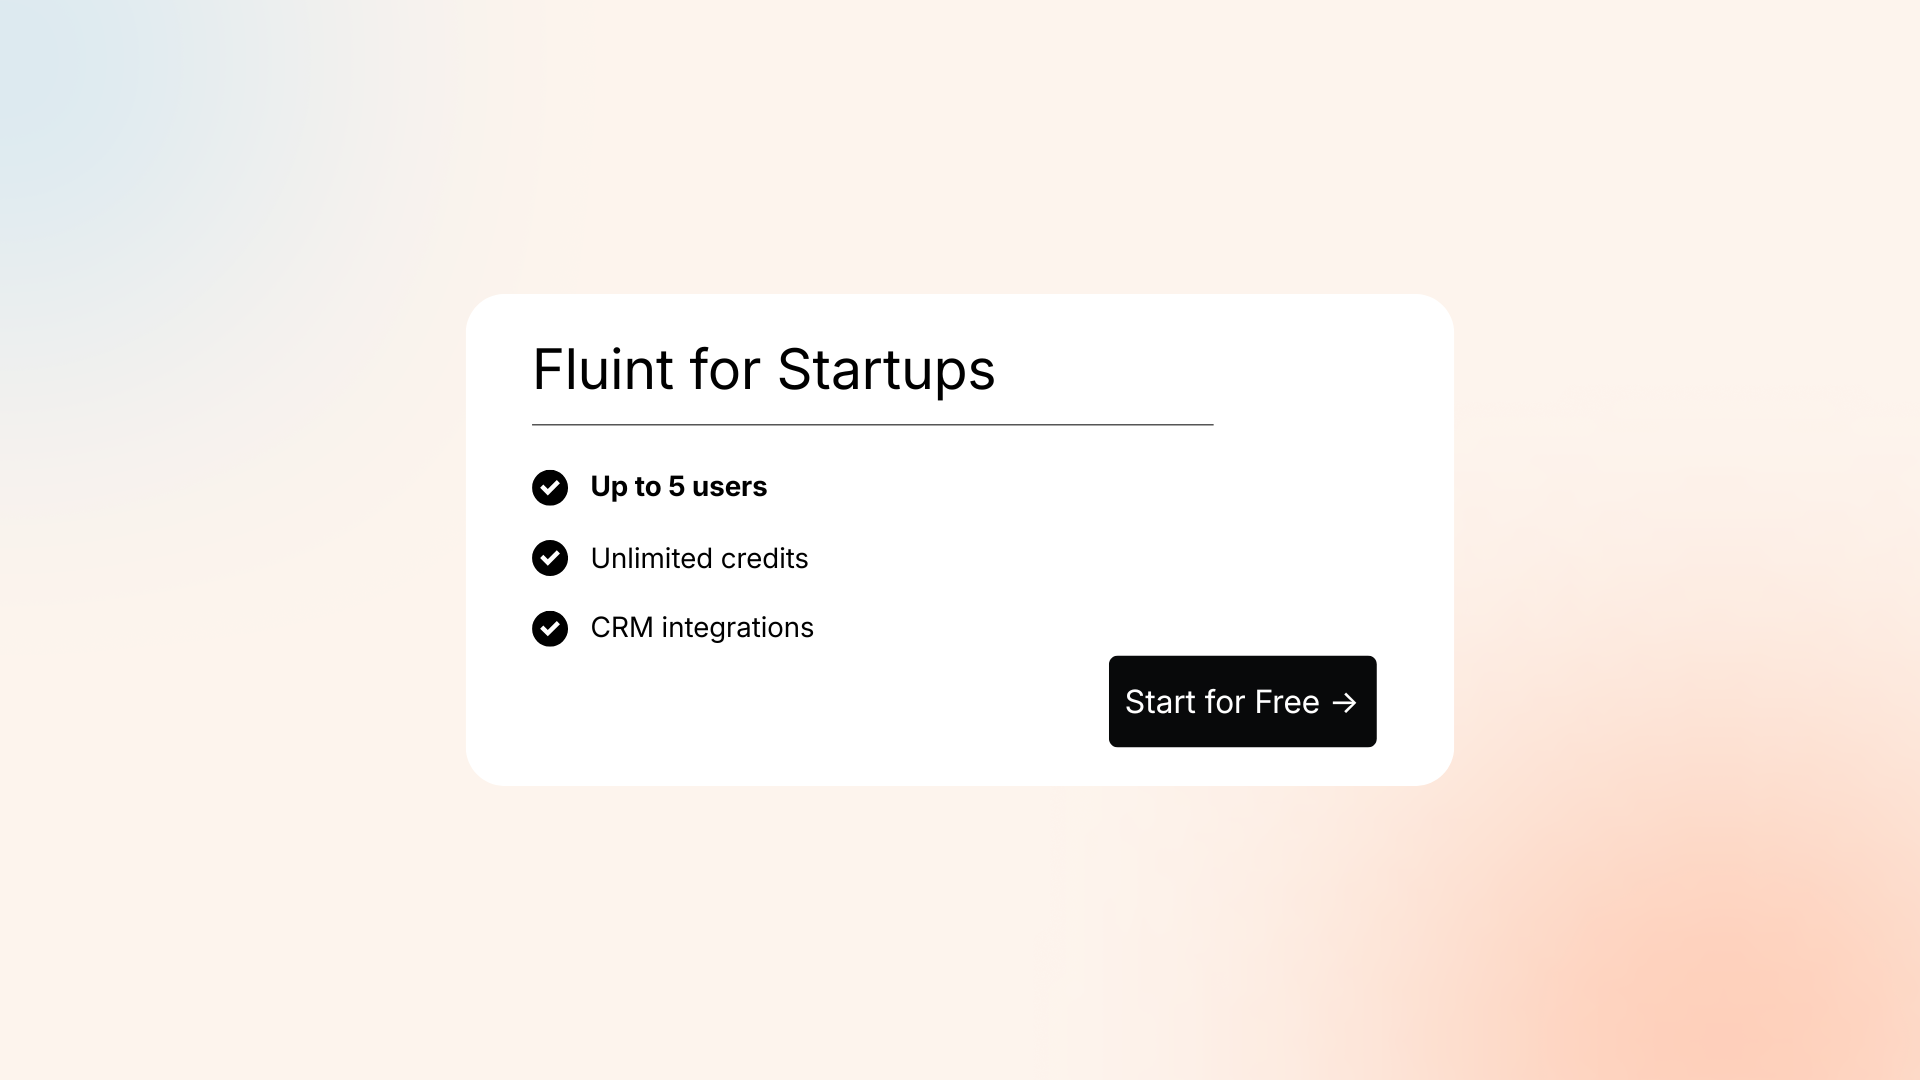
Small, high-growth teams need deal intelligence that scales without usage caps or onboarding delays. The Startups tier is built for teams of up to 5 to get up and running immediately—and comes with unlimited usage and the same ML-trained deal scoring we built for enterprise teams.
Unlock Olli’s full capabilities across your entire workflow. By connecting directly to your CRM and syncing with Slack and email, Olli sits inside the tools you already use to identify deal risk and automate exec summaries. Get started in less than 10 minutes with a guided, self-service setup so you can start winning deals on day one.
How it works
Unlimited Deal Intelligence: Full access to Olli’s reasoning and ML-trained deal scoring for teams of up to 5.
Powerful Integrations: Olli works where you do, with native connections to Salesforce, HubSpot, Slack, and Gmail/Outlook.
Self-Service Setup: A guided checklist gets you running in minutes, including Olli researching your company context automatically.
Automated Execution: Olli writes demo briefs, action plans, and business cases based on your specific deal frameworks.
Pipeline-Wide Patterns: Analyze the entire dataset to spot ramp-up patterns and stage bottlenecks across the team.
Getting Started
Upgrade to the Startups tier via the Settings -> Billing page. Once you do, you'll see the setup checklist right away:
- Add your team members
- Connect your integrations (CRM, meetings, Slack)
- Review and expand the global context Olli researched
- Configure frameworks, chat flows, and sales process as needed
- Set up playbooks for automated actions
Olli, Meet Claude: Your Deal Intelligence, Now Available In Claude
Your deal context and Fluint workflows, directly inside your Claude conversations.
Why it matters
Sales prep usually involves a "tab tax"—toggling between your CRM, your notes, and your AI assistant to copy-paste context. By bringing Olli directly into Claude, we’re removing the friction between where you think and where your data lives.
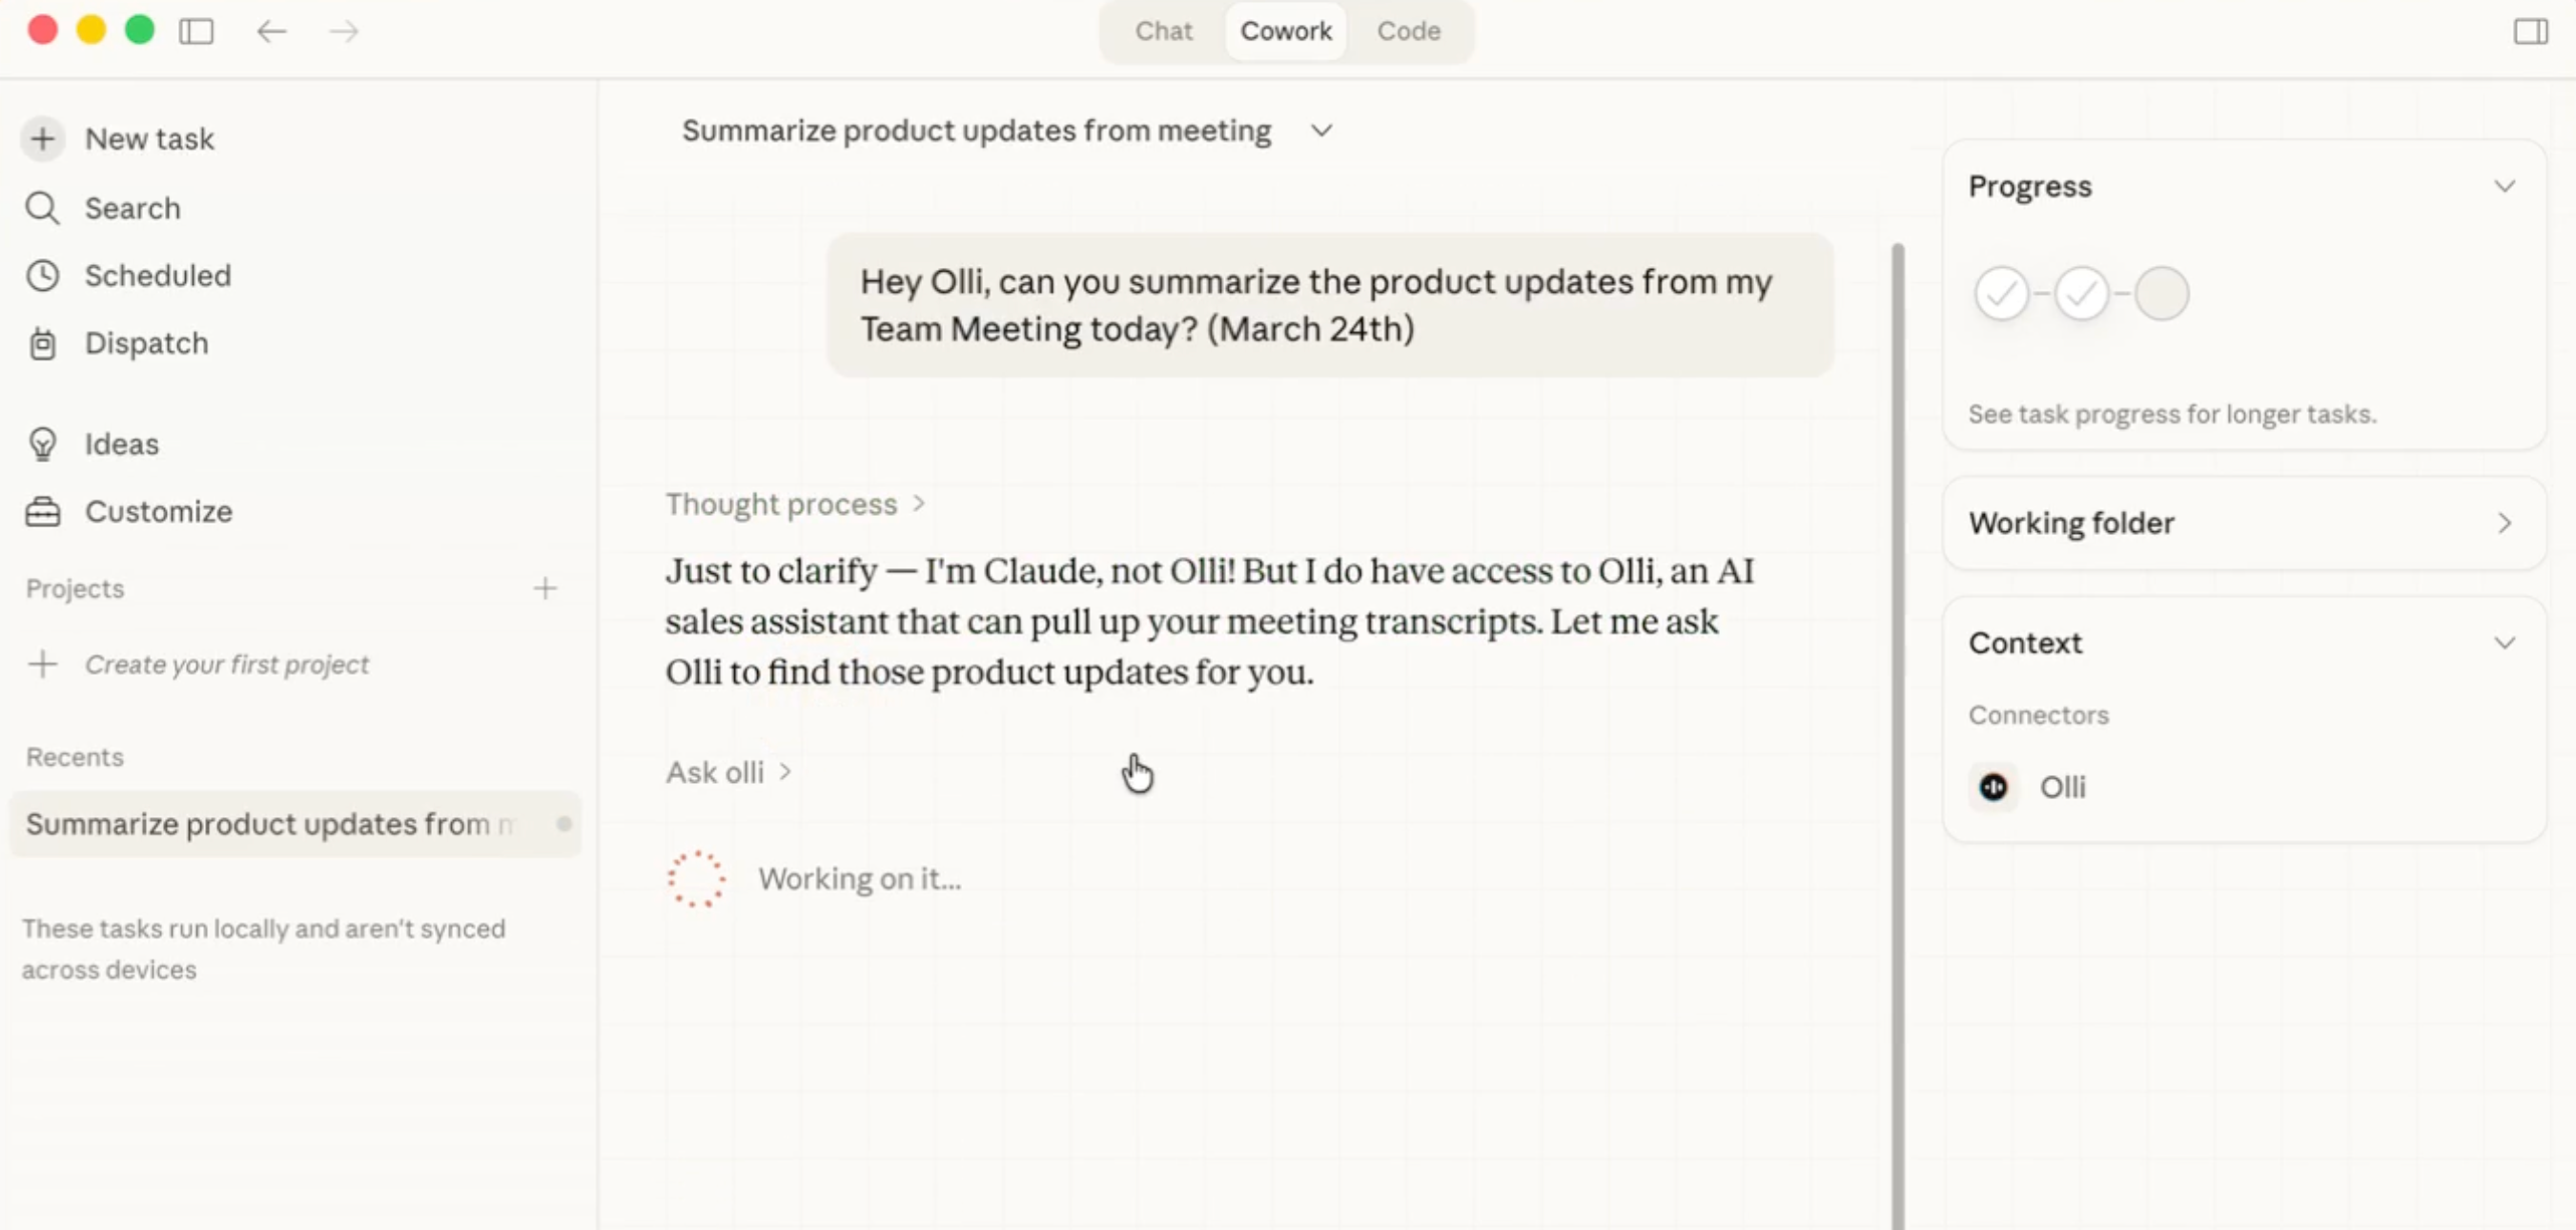
Now, Olli acts as a real-time bridge. Whether you’re drafting a follow-up email or strategizing for a renewal, you don't have to leave the chat to remember a stakeholder's name or a specific objection. You simply mention Olli, and the ground truth of your deals is pulled into the conversation automatically. It transforms Claude from a general assistant into a specialized deal expert that already knows your pipeline.
How it works
Olli lives inside Claude: Connect once and Olli becomes a native skill. No more tab-switching or manual data entry. Whether you're on Mobile, Desktop, or the Web UI, Olli is one mention away.
Full deal context, on demand: Ask about a specific account and Olli surfaces stakeholders, recent activity, objections, and competitors—all grounded in your live Fluint data.
Contextual intelligence: Olli understands the conversation. If you're prepping for a call, he brings the relevant deal history into that specific thread so you never have to re-explain the situation.
One-time setup: Once connected as a custom connector, Olli is toggled on by default. He’s ready to work the moment you open a new chat.
Getting Started
- Log into Fluint, go to Settings, and click the Olli for Claude tab
- Copy your MCP Server URL and OAuth Client ID (you won't need the Client Secret)
- In the Claude desktop app, click (+) → hover over Connectors → Manage Connectors → Add a Custom Connector
- Name it Olli, paste in your MCP Server URL and OAuth Client ID, then click Add
- Click on Connect and follow the authentication steps to link your Fluint account
- Start a conversation, mention Olli by name, and ask about any deal — he's ready to go
Olli Memory: The More You Use It, The Better It Gets
Olli now remembers your preferences, from your personal writing style to your company’s messaging standards.
Why it matters
The biggest friction in using AI for sales is having to "re-teach" the model your specific tone, formatting, or strategic angles every single time you start a new chat. If you prefer leading with ROI instead of technical features, you shouldn't have to say it twice.
Olli Memory turns every correction into a permanent asset. By capturing these nuances—like "make this shorter" or "frame this around cost savings"—Olli builds a library of your personal and organizational "tribal knowledge." For sales leaders, this means new hires don't just get a tool; they inherit the institutional memory of how your team wins deals, right from day one.
How it works
Corrections that stick: Redirect Olli mid-conversation and he captures the preference on the spot. A capture indicator appears inline so you know the "learning" was saved.
Visible attribution: Transparency is key. When Olli applies a saved preference, he shows you an attribution chip so you know exactly which logic he’s following.
Two levels of memory: Olli distinguishes between your personal flair and your organization’s messaging standards, ensuring your unique voice stays yours while the company’s brand stays consistent.
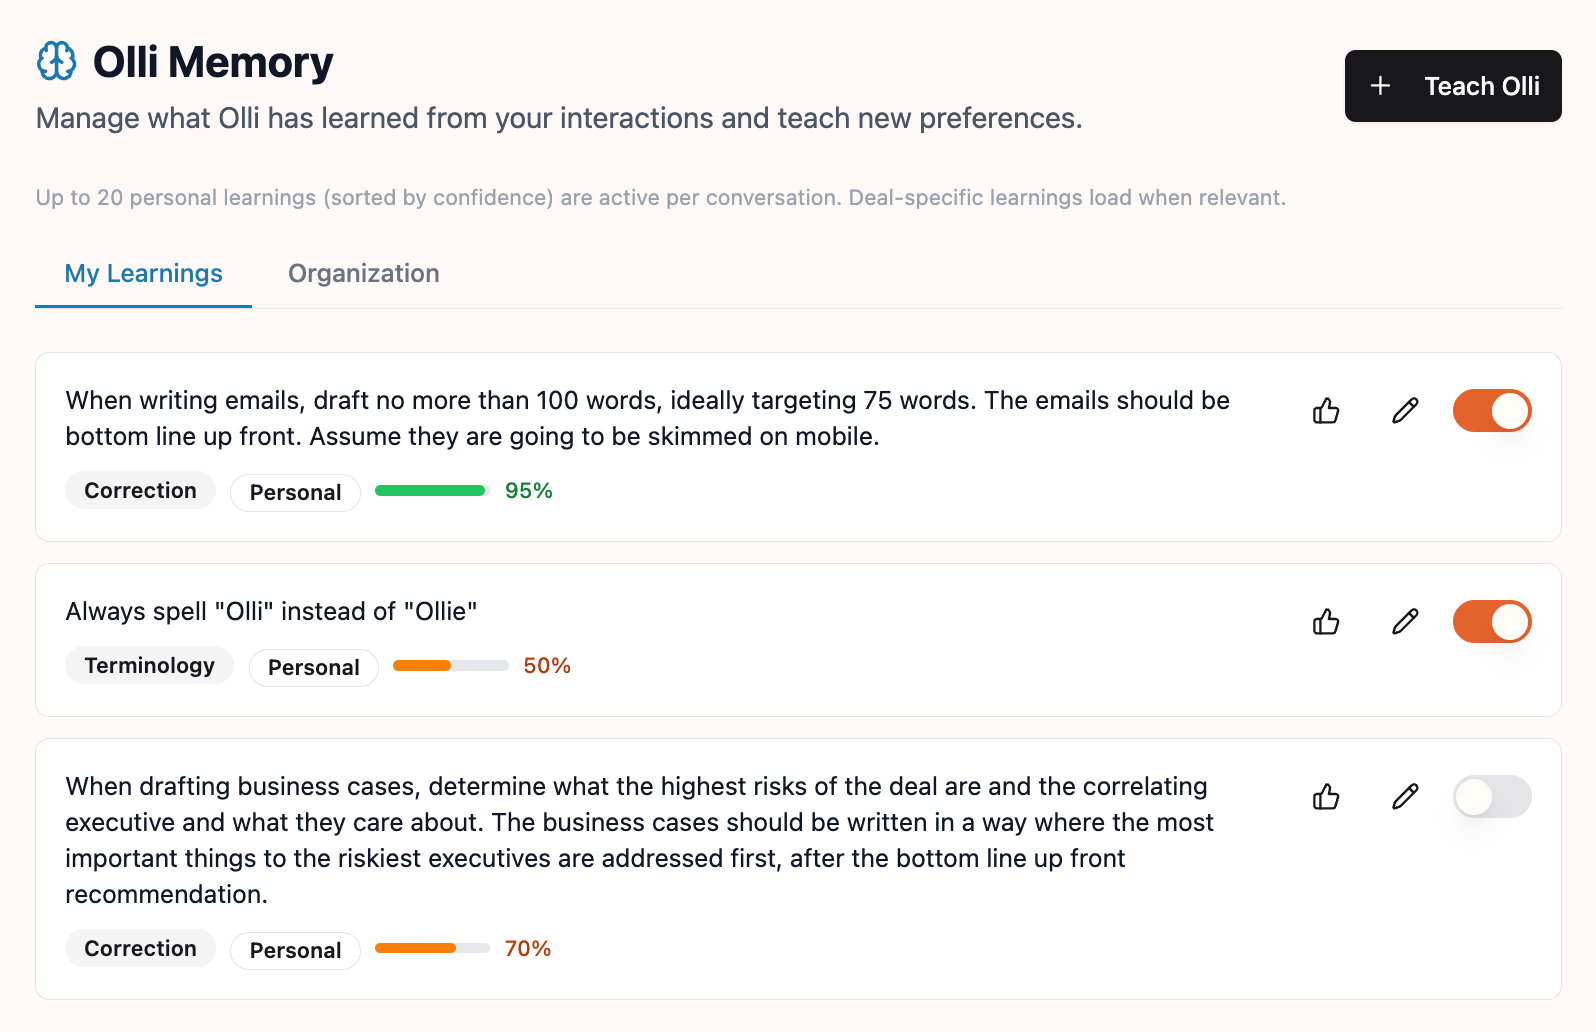
The "What Olli Knows" panel: Click the brain icon in the sidebar during any chat to see active learnings grouped by type, giving you full visibility into Olli's current "mindset."
Full control: The Olli Memory view in your settings allows you to edit, toggle off, or manually add preferences at any time.
Getting Started
- Correct Olli naturally in any chat ("make this shorter" or "lead with ROI") and watch the capture indicator appear.
- Click Manage on the capture indicator to review the learning and adjust its scope.
- In your next conversation, look for the attribution chip to see which preferences were applied.
- Open Olli Memory under Settings in the sidebar to review, edit, or manually teach Olli something new.
Pipeline Insights: Ask Olli About Your Whole Pipeline
One question across your entire pipeline — not one deal at a time.
Why it matters
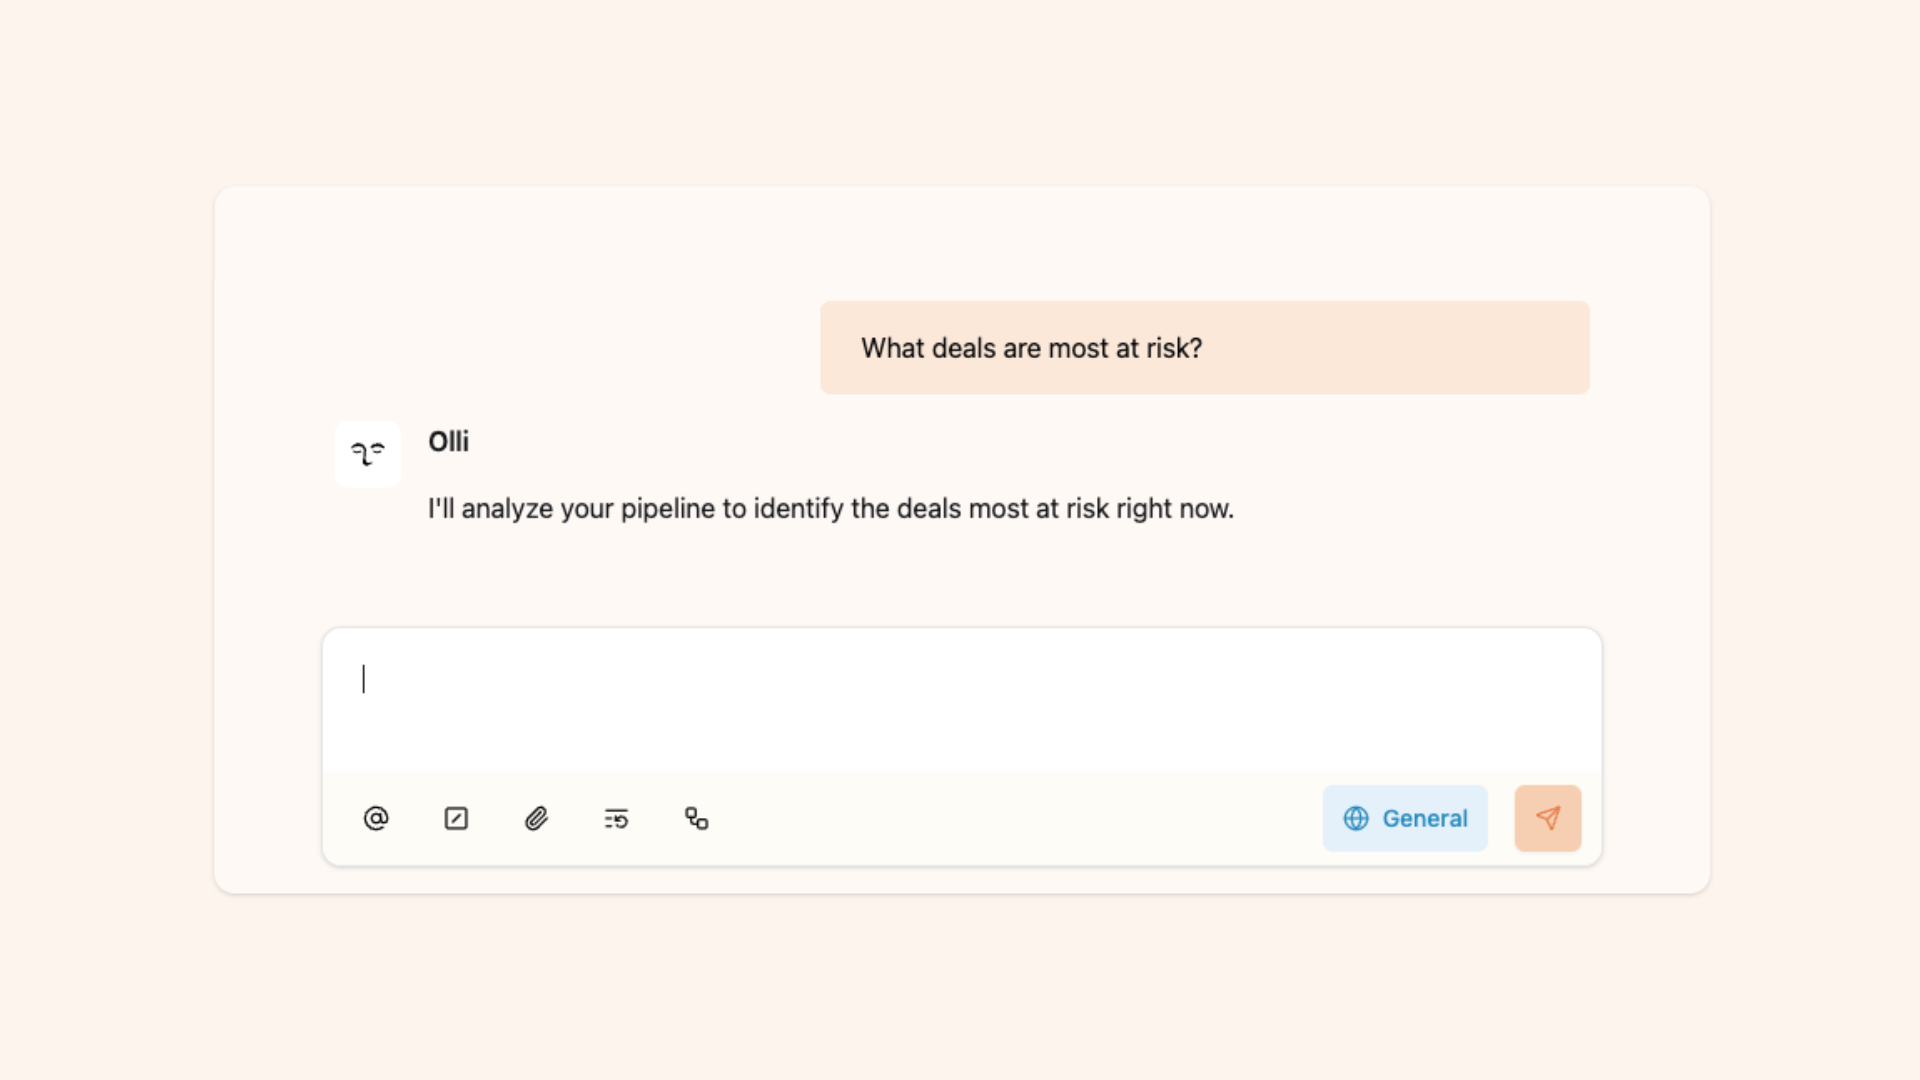
Olli has always been great at going deep on a single deal. Now he goes wide. Sales leaders can ask the questions they actually bring to pipeline reviews — "Why are we losing in Stage 3?" "What patterns do you see across stuck deals?" "Where's risk concentrated this quarter?" — and get grounded answers in seconds.
Now Olli works across your entire pipeline at once. It pre-computes health signals, document summaries, and account relationships in the background, so when you ask a broad question, the analysis is already done. What used to be a half-day of research before a pipeline review is now a single question.
How it works
Olli can now scan your full pipeline and return grounded answers with real deal names, patterns, and data — not generic summaries.
Multi-deal analysis surfaces patterns across deals. Ask why you're losing at a specific stage or which deals have gone cold, and Olli reports back across the whole pipeline.
Activity timelines track engagement chronologically across deals, so you can spot where momentum dropped, which deals went quiet, and what happened after key meetings.
Deal health signals score every deal automatically — on-track, at-risk, or stalled — updated with each new email, meeting, or CRM change. Ask about any deal and Olli surfaces stakeholders, competitors, objections, compelling events, and buying process stage.
Document intelligence analyzes proposals, mutual action plans, and contracts on upload. Ask Olli to summarize docs tied to a deal and it pulls out pricing, commitments, conditions, contacts, and engagement data.
Account summaries give you the full relationship picture — health, revenue, deal history, key contacts, and expansion or churn signals. You can also surface health signals across multiple accounts filtered by risk category.
Pipeline patterns reveal win/loss trends, stage bottlenecks, risk concentration, and competitive positioning across your pipeline.
Getting Started
- Ask "Why are we losing deals this quarter?" or "Which deals are most at risk?"
- Ask "Which deals have had no activity in 30 days?" to surface what's gone quiet
- Ask "Summarize our relationship with [Account Name]" for a full account view
- Ask "What pricing did we offer in the Globex proposal?" to pull details from a doc
- Use it before pipeline reviews — "Where are deals getting stuck most often?"

Let’s see if there’s a good fit
We’ll look at how other GTM teams are already: